



Initial Project Setup Guidance
When spinning up or scaffolding a new Aircada project, a rigorous, systematic approach is required to guarantee that global application state, React 2D layouts, and visual 3D elements are perfectly synchronized and highly scalable.
Phase 3: Operator Architecture & Granularity#
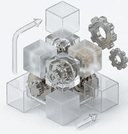
With the UI overlay communicating with the store, you must architect the 3D custom logic Operators. Operators serve as the bridge between TypeScript coding and visual layout. Review the Operator Architectural Philosophy to understand the decoupling framework.
1. Exposing Node Graph Connections
Decorate relevant inputs, outputs, or configuration keys with @Input(), @Output(), or @Property() so designers in the visual Studio can wire them directly into the meshes or engine effects. Check Operator Decorators to understand port bindings.
2. Determining Operator Granularity
Decide on the layout based on the scale of the configurator project. For simple cases, follow the Operator Code Implementation Template directly. For highly complex setups, consult the Operator Coding Guardrails to ensure stateless parts duplication without editing code.
Phase 1: State & Store Configuration#
The absolute first step of any Aircada implementation is to establish the shape of runtime data. The AirStoreConfig class acts as the single source of truth for both React frontend and the 3D visual engine. Refer to The Store Interface Guide to start declaring properties, and make sure you understand the Twin-Proxy Vault Architecture which isolates UI and physics ticks.
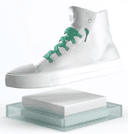
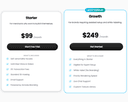
In e-commerce scenarios where you are constructing a 3D product configurator, the options system should always be preferred. If no pricing model option sets exist, you must create one or more option sets based on the DesignManifest or other instructions. Using the options system enables the dynamic configuration of product variations and pricing directly through Aircada Studio's dataset and pricing model systems.
1. Defining Types and Defaults
You must plan out the TypeScript interfaces and initial value structures living inside your store.config.ts file to exhaustively cover three core areas: View State (user viewport path), UI-Input State (toggles and numbers), and Scene State (non-UI metrics).
2. Integrating Registries
Before finalizing the store setup, compile the cloud-designed systems to generate local assets and verify auto-generated registry files. The Aircada CLI & Registry System processes visual docs.studio structures to yield strictly typed mappings like the Aircada Data Registries and the Options Registry. Interrogate these files (e.g. scene.registry.ts, options.registry.ts, and media.registry.ts) to map design-time options straight into your code variables.
- Exhaustive Scope: Define as many state concepts and edge cases as likely to occur given the project specifications.
- Registry Alignment: If specific Option Sets or items exist in the registry schemas, you must map those strictly typed Option set keys into your store instead of inventing arbitrary strings.
Phase 2: UI Planning and Implementation#
Once the global data schema is defined according to specs and registry files, you proceed to scaffold and code the 2D React UI interface overlay. Review the 2D UI System Overview to understand viewport positioning, and check the React UI Store Guidelines for subscribing to Vault updates cleanly.
1. Review References and Inspiration
Locate and review all specs, design schemas, layout grids, or image inspirations inside the root /docs folder to understand UX flow expectations.
2. Component Scaffolding
Structure component mounting logic based directly on the active app.currentView value from the store to cleanly switch views.
3. Leverage @aircada/react
Do not write complex visual interactive items from scratch. Inspect the @aircada/react library to identify pre-existing components (e.g. standard carousels, responsive overlays, styling grids) to accelerate development. Ensure your visual system adheres to Aircada Styling & DOM Standards.